Graphviz in the service of Factorio (pt 1)
Graphviz is a software that renders graphs, Factorio is a game in which you build and maintain factories; let's explore how both can complement each other.
Case study: Logistic science pack
The story goes: we've started the game, built a few mining drills (particularly for coal, iron and copper) and got a basic electrical grid set up - time for science!
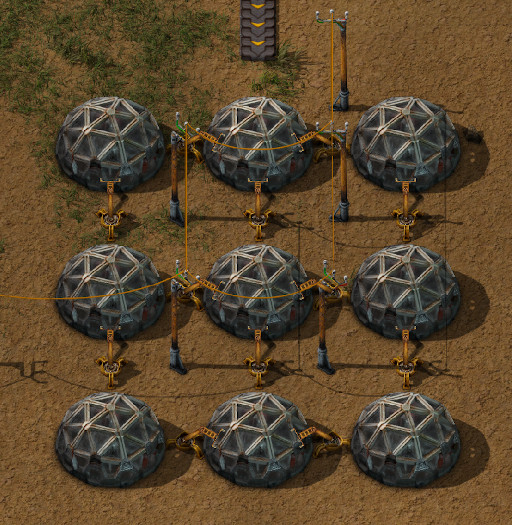
Certainly, we need a handful of laboratories:
For our laboratories to work, we need a production line that will provide a constant flow of science packs; since automation science packs are turbo-easy to produce, let's ignore them and focus right-away on logistic science packs.
As we can find on Factorio's Wiki:
-
To produce
1 logistic science pack, we'll need1 inserterand1 transport belt. -
Before though, to produce that
1 inserter, we'll need1 electronic circuit,1 iron gear wheeland1 iron plate. -
Before though, to produce that
1 electronic circuit, we'll need… well, describing this in English gets tedious; what do you say we invent some notation to make the our recipe just a tad more legible?
Let's start with a minimalistic textual format of:
product
    requirements
Oh, thinking about all the stuff we can do with this grammar-boi gives me shivers running down my spine!
Translating the former ingredients, we get:
logistic_science_pack
    inserter
    transport_belt
Since both inserter and transport_belt need
to be produced too, let's include them as well:
logistic_science_pack
    inserter
    transport_belt

inserter
    electronic_circuit
    iron_gear_wheel
    iron_plate

transport_belt
    iron_gear_wheel
    iron_plate
Similarly, we'll need to produce electronic_circuit,
iron_gear_wheel and - generally - everything that's not
primitive (which in my case means that I'll need to produce everything
up to iron_plate and copper_plate):
logistic_science_pack
    inserter
    transport_belt

inserter
    electronic_circuit
    iron_gear_wheel
    iron_plate

transport_belt
    iron_gear_wheel
    iron_plate

electronic_circuit
    copper_cable
    iron_plate

copper_cable
    copper_plate

iron_gear_wheel
    iron_plate
This was the first step.
So far, we've gathered all the knowledge about what needs to be fetched (think: copper plates) and what needs to be built (think: iron gear wheels) - our original problem remains open though: where to place those assembly machines?
That's when graphs come into play.
Introduction to graphs
Graphs are structures used to model relationships between objects - using graphs you can represent things like family trees or networks of friends:

Graphs consist of nodes (Patryk,
Dafne etc. on the image above) and edges (the
lines connecting nodes).
Graphs can be undirected (like the one above) or directed:

Graphs can be rendered by computers (like the one above) or, obviously, by hand:

Since this post is all about automating stuff, we're going to focus solely on the computer-generated graphs - using Graphviz.
Graphviz is a software that transforms description of a graph (written in the DOT language) into an image; for instance, here's source code of the directed graph you saw above:
# This instruction starts a directed graph
digraph {
    # This instruction makes the graph go left-to-right
    rankdir = "LR"

    # Those instructions define nodes and edges ("connections")
    Patryk -> Dafne
    Dafne -> Patryk
    Dafne -> Niko
    Dafne -> Dulcia
    Dulcia -> Charlie
}
What's peculiar about the DOT language, and what we're going to
exploit in a second, is the fact that we don't have to specify
where our nodes and edges should be located - we just say
Patryk → Dafne, Dafne → Niko and the
program, almost magically, lays out everything for us in an
aesthetically-pleasant way.
Let's see how we can use this feature to answer the problem we had in the previous section.
Case study: Logistic science pack (cont.)
Let's recall our recipe:
logistic_science_pack
    inserter
    transport_belt

inserter
    electronic_circuit
    iron_gear_wheel
    iron_plate

transport_belt
    iron_gear_wheel
    iron_plate

electronic_circuit
    copper_cable
    iron_plate

copper_cable
    copper_plate

iron_gear_wheel
    iron_plate
Since Graphviz doesn't understand our notation (we've just invented it, right?), first we have to translate it into the DOT language.
Let's start with logistic_science_pack:
digraph {
    inserter -> logistic_science_pack
    transport_belt -> logistic_science_pack
}

Now it's time for inserter and
transport_belt:
digraph {
    inserter -> logistic_science_pack
    transport_belt -> logistic_science_pack

    electronic_circuit -> inserter
    iron_gear_wheel -> inserter
    iron_plate -> inserter

    iron_gear_wheel -> transport_belt
    iron_plate -> transport_belt
}

And so on, and so forth, until we finally end up with:
digraph {
    # ...

    copper_cable -> electronic_circuit
    iron_plate -> electronic_circuit

    copper_plate -> copper_cable

    iron_plate -> iron_gear_wheel
}
digraph {
    inserter -> logistic_science_pack
    transport_belt -> logistic_science_pack

    electronic_circuit -> inserter
    iron_gear_wheel -> inserter
    iron_plate -> inserter

    iron_gear_wheel -> transport_belt
    iron_plate -> transport_belt

    copper_cable -> electronic_circuit
    iron_plate -> electronic_circuit

    copper_plate -> copper_cable

    iron_plate -> iron_gear_wheel
}

Neat, we've finally extracted some new information from the system: placement and wiring!
Granted, it's not perfect (fat chance those curvy transport belts would actually work in the game), but it's a nice starting point - now let's try to improve it.
Since transport belts must be straight, let's start by forcing the
edges to be in line via splines = ortho:
digraph {
    splines = ortho

    # ...
}
digraph {
    splines = ortho

    inserter -> logistic_science_pack
    transport_belt -> logistic_science_pack
    electronic_circuit -> inserter
    iron_gear_wheel -> inserter
    iron_plate -> inserter
    iron_gear_wheel -> transport_belt
    iron_plate -> transport_belt
    copper_cable -> electronic_circuit
    iron_plate -> electronic_circuit
    copper_plate -> copper_cable
    iron_plate -> iron_gear_wheel
}

It looks somewhat better, but still kinda sloppy.
Since in my factory I'm going to transport copper plates next to iron
plates, it will be helpful to align
copper_plate on the same level as
iron_plate (since both will effectively function as
"inputs" to our module).
To align nodes, we can use the rank instruction:
digraph {
    # ...

    {
        # This instruction tells Graphviz
        # to align all nodes located in
        # this block next to each other
        rank = same

        copper_plate
        iron_plate
    }

    # ...
}
digraph {
    splines = ortho

    {
        rank = same

        copper_plate
        iron_plate
    }

    inserter -> logistic_science_pack
    transport_belt -> logistic_science_pack
    electronic_circuit -> inserter
    iron_gear_wheel -> inserter
    iron_plate -> inserter
    iron_gear_wheel -> transport_belt
    iron_plate -> transport_belt
    copper_cable -> electronic_circuit
    iron_plate -> electronic_circuit
    copper_plate -> copper_cable
    iron_plate -> iron_gear_wheel
}

Well, our new layout is both technically correct and a bit
disappointing - even though we've managed to get
copper_plate and iron_plate on the same
level, we've also ended up with two crossing edges (next to
transport_belt), which is a no-go for such a small
module.
Let's help Graphviz by additionally aligning inserter and
transport_belt on the same level:
digraph {
    # ...

    {
        rank = same

        inserter
        transport_belt
    }

    # ...
}
digraph {
    splines = ortho

    {
        rank = same

        copper_plate
        iron_plate
    }

    {
        rank = same

        inserter
        transport_belt
    }

    copper_plate -> copper_cable
    copper_cable -> electronic_circuit
    iron_plate -> electronic_circuit
    electronic_circuit -> inserter
    iron_gear_wheel -> inserter
    iron_plate -> inserter
    iron_plate -> iron_gear_wheel
    inserter -> logistic_science_pack
    transport_belt -> logistic_science_pack
    iron_gear_wheel -> transport_belt
    iron_plate -> transport_belt
}

... at least this time we've got something we could actually build in the game!
No reason to rest on our laurels so soon though - since Factorio's assembly machines are squares, it would make sense to make our appropriate nodes look like squares too:
digraph {
    # ...

    copper_cable [shape = box]
    electronic_circuit [shape = box]
    iron_gear_wheel [shape = box]
    inserter [shape = box]
    transport_belt [shape = box]
    logistic_science_pack [shape = box]

    # ...
}
digraph {
    splines = ortho

    {
        rank = same

        copper_plate
        iron_plate
    }

    {
        rank = same

        inserter
        transport_belt
    }

    copper_cable [shape = box]
    electronic_circuit [shape = box]
    iron_gear_wheel [shape = box]
    inserter [shape = box]
    transport_belt [shape = box]
    logistic_science_pack [shape = box]

    copper_plate -> copper_cable
    copper_cable -> electronic_circuit
    iron_plate -> electronic_circuit
    electronic_circuit -> inserter
    iron_gear_wheel -> inserter
    iron_plate -> inserter
    iron_plate -> iron_gear_wheel
    inserter -> logistic_science_pack
    transport_belt -> logistic_science_pack
    iron_gear_wheel -> transport_belt
    iron_plate -> transport_belt
}

Seizing the day, let's make them all of the same size as well:
digraph {
    /* ... */

    copper_cable [
        shape = box,
        width = 1.5,
        height = 1.5,
        fixedsize = true
    ]

    electronic_circuit [
        shape = box,
        width = 1.5,
        height = 1.5,
        fixedsize = true
    ]

    /* ... */
}
digraph {
    splines = ortho

    {
        rank = same

        copper_plate
        iron_plate
    }

    {
        rank = same

        inserter
        transport_belt
    }

    copper_cable [
        shape = box,
        width = 1.5,
        height = 1.5,
        fixedsize = true
    ]

    electronic_circuit [
        shape = box,
        width = 1.5,
        height = 1.5,
        fixedsize = true
    ]

    iron_gear_wheel [
        shape = box,
        width = 1.5,
        height = 1.5,
        fixedsize = true
    ]

    inserter [
        shape = box,
        width = 1.5,
        height = 1.5,
        fixedsize = true
    ]

    transport_belt [
        shape = box,
        width = 1.5,
        height = 1.5,
        fixedsize = true
    ]

    logistic_science_pack [
        shape = box,
        width = 1.5,
        height = 1.5,
        fixedsize = true
    ]

    copper_plate -> copper_cable
    copper_cable -> electronic_circuit
    iron_plate -> electronic_circuit
    electronic_circuit -> inserter
    iron_gear_wheel -> inserter
    iron_plate -> inserter
    iron_plate -> iron_gear_wheel
    inserter -> logistic_science_pack
    transport_belt -> logistic_science_pack
    iron_gear_wheel -> transport_belt
    iron_plate -> transport_belt
}

Not sure about you, but I am in awe seeing how well Graphviz managed to lay our graph out - we could reconstruct it almost 1:1 in the game!
There's just one itsy-bitsy tiny thing we may still iterate on:
Do you see that iron_gear_wheel near the centre?
Currently it's responsible for producing wheels both for
transport_belt and inserter, which means
we'd have to apply a splitter - this seems overly troublesome by my
standards, so let's just create two separate assembly machines
instead:
digraph {
    /* ... */

    iron_plate -> iron_gear_wheel_1
    iron_gear_wheel_1 -> inserter

    iron_plate -> iron_gear_wheel_2
    iron_gear_wheel_2 -> transport_belt

    /* ... */
}
digraph {
    splines = ortho

    {
        rank = same

        copper_plate
        iron_plate
    }

    {
        rank = same

        inserter
        transport_belt
    }

    copper_cable [
        shape = box,
        width = 1.5,
        height = 1.5,
        fixedsize = true
    ]

    electronic_circuit [
        shape = box,
        width = 1.5,
        height = 1.5,
        fixedsize = true
    ]

    iron_gear_wheel_1 [
        shape = box,
        width = 1.5,
        height = 1.5,
        fixedsize = true
    ]

    iron_gear_wheel_2 [
        shape = box,
        width = 1.5,
        height = 1.5,
        fixedsize = true
    ]

    inserter [
        shape = box,
        width = 1.5,
        height = 1.5,
        fixedsize = true
    ]

    transport_belt [
        shape = box,
        width = 1.5,
        height = 1.5,
        fixedsize = true
    ]

    logistic_science_pack [
        shape = box,
        width = 1.5,
        height = 1.5,
        fixedsize = true
    ]

    copper_plate -> copper_cable
    copper_cable -> electronic_circuit
    iron_plate -> electronic_circuit
    electronic_circuit -> inserter
    iron_gear_wheel_1 -> inserter
    iron_plate -> inserter
    iron_plate -> iron_gear_wheel_1
    iron_plate -> iron_gear_wheel_2
    inserter -> logistic_science_pack
    transport_belt -> logistic_science_pack
    iron_gear_wheel_2 -> transport_belt
    iron_plate -> transport_belt
}

Seems like we've made it! -- this our our toy at work:
The first potion gets produced at 0:25, which is a rather long time, but - even so - it's a success!
Now, there's a vast array of things we could still work on - mainly:
Up to this point we didn't really care about how long it takes
to produce each part - and so at 0:33 we can see that everything gets
bottle-necked at the final,
logistic_science_pack assembly machine.
Solving this issue is left as an exercise for the reader :-)
Case study: Chemical science pack
This one is actually going to be way shorter - let's skip all the ceremony and jump straight into the recipe:
chemical_science_pack
    advanced_circuit
    engine_unit
    sulfur

advanced_circuit
    copper_cable
    electronic_circuit
    plastic_bar

copper_cable
    copper_plate

electronic_circuit
    copper_cable
    iron_plate

plastic_bar
    coal
    petroleum_gas

engine_unit
    iron_gear_wheel
    pipe
    steel_plate

iron_gear_wheel
    iron_plate

pipe
    iron_plate

steel_plate
    iron_plate

sulfur
    petroleum_gas
    water
Now, since I don't enjoy arduous, repetitive tasks, I've prepared a tiny application that can do the graphing for me:
https://factorio-layouter.pwy.io
Summary & future work
As with everything, so doesn't using Graphviz solve all our problems.
I find it helpful in planning the initial sketches of various modules (which I later reiterate on a piece of paper before eventually reconstructing in Factorio), and that's why I wanted to share this method with you.